I – Installation
1 – Prepare Your Magento
It is recommended to install the extension on a test server before you install it in a live store.
Backup Magento files and the store database. Important: Creating backup before installation of any extensions in Magento is extremely important,especially when are working on a live store.
Disable Compilation Mode in System >Tools > Compilation.
Disable:
- Magento Cache (refer to II.1.2 Disable Cache For Details)
- Full page cache and caching module for Magento (such as Speedster)
- Any Additional cache on your server,PHP cache engines,APC,etc.
Important: When developing your Magento store, in order to be able to see changes immediately, you should completely disable the cache.You can enable it after you finish configuring your store. - Remove all possible custom modifications of the Magento “base” theme. “alomagicproduct”(same as any Magento theme) relieson “base” theme,so any modifications of the “base” theme can change the default behavior of alomagicproduct and break some functionality.You should never edit“base” theme’s files.
- Log out from Magento admin panel. Do not just close the browser window: you need to click Log Out link to refresh the access control system.
2 – Install
2.1 Install Extension
Please following steps below:
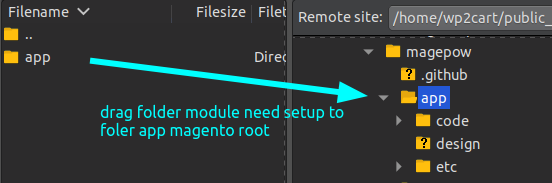
Step 1:Upload the whole Extension package (app folder ) to your server.
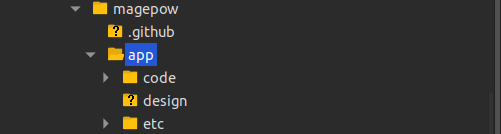
Update extension to your server or copy folder app above to your Magento in localhost.
Step 2: Install extension
After the successful installation you have to run the command on Magento2 root directory
commandline: php bin/magento setup:upgrade

Also, run this commands in the Magento2 Root.
commandline: php bin/magento setup:static-content:deploy -f
You can refer the below screenshot.

After running the command, you have to log into the admin panel and you have to clear the Cache.
You can refer to the below screenshot.

Step 3: Finish installer.
II – How To Use Extension
The following chapter describes some of the basic Magento settings and features. Please note that as authors of this theme we provide support only for the issues related strictly to the extension. Support for Magento configuration/ installation/ maintenance etc is beyond the scope of our support. This chapter should be only treated as a starting point, more information about Magento can be found in Magento documentation : Magento help
1 – How To Config The Extension
- Menu
You can log in Admin > Magiccart > Magic Menu > Menu. It will look like this:
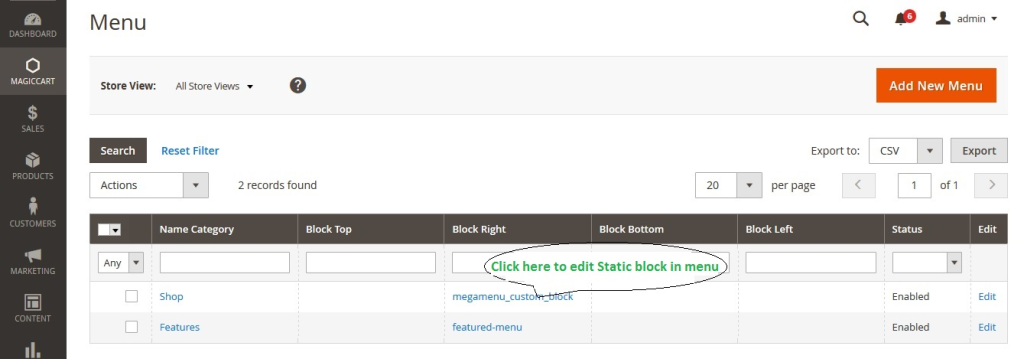
Then, you can click Add New Menu or Edit. After that, click save to finish.
2. Extra Menu
You can log in Admin > Magiccart > Magic Menu > Extra Menu. It will look like this:
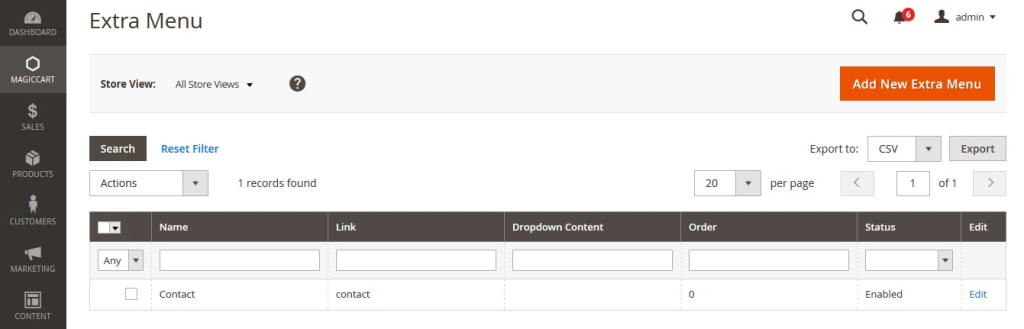
Then, you can click Add New Menu or Edit. After that, click Save to finish.
3. Configuration
You must log in Admin > STORES > Configuration > Magic Menu to config. It might look like this:
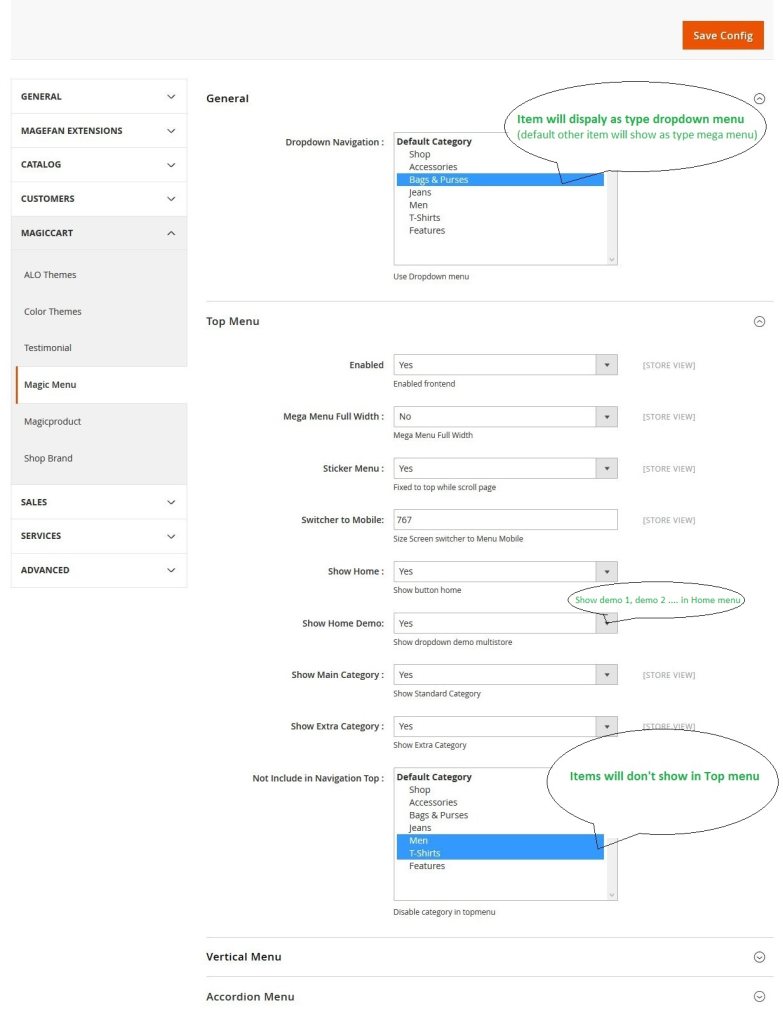
You can change settings or edit. After that, click Save Config to finish.
4. Custom Menu
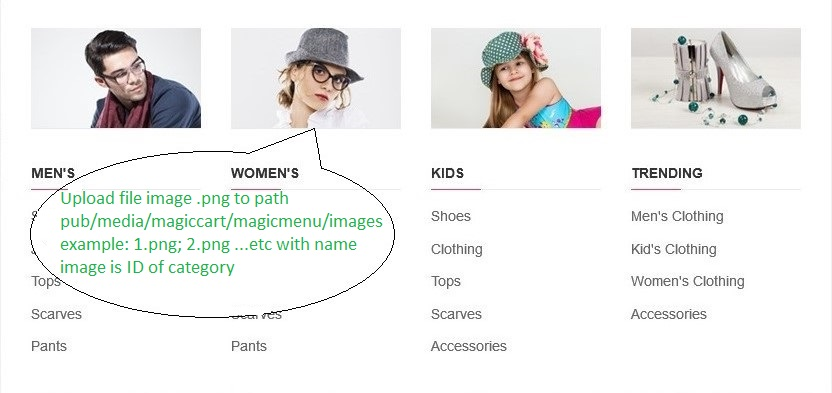
4.1 Add Thumbnail, Image to category in mega menu:
Example 1: Add image to category (only for level 2)
Upload file image .png to path pub/media/magiccart/magicmenu/images
example: 1.png; 2.png …etc with name image is ID of category
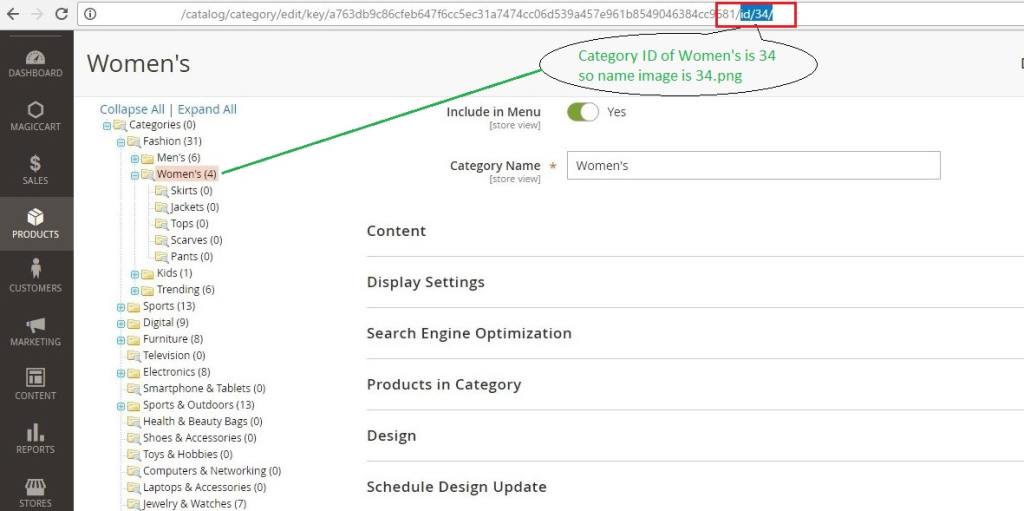
How to get ID of category?
You go to Products > Categories => choose category and get it as image below:

Example 2: Add thumbnail to category(only for level 1 of vertical menu)
Upload file image .png to path pub/media/magiccart/magicmenu/thumbnail
example: 1.png; 2.png …etc with name image is ID of category

How to get ID of category?
You go to Products > Categories => choose category and get it as image below:
4.2 Add custom block to mage menu:
Example 1: Add block to right menu
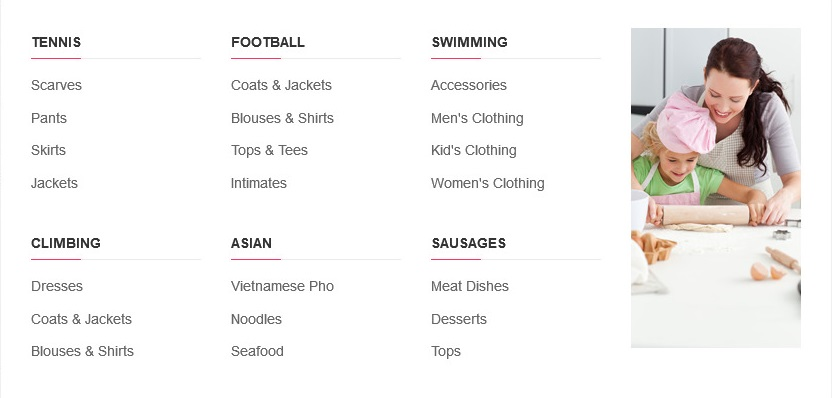
Go to Magiccart > Magic Menu > Menu > Add New Menu => Choose Menu want to custom and config as example below:
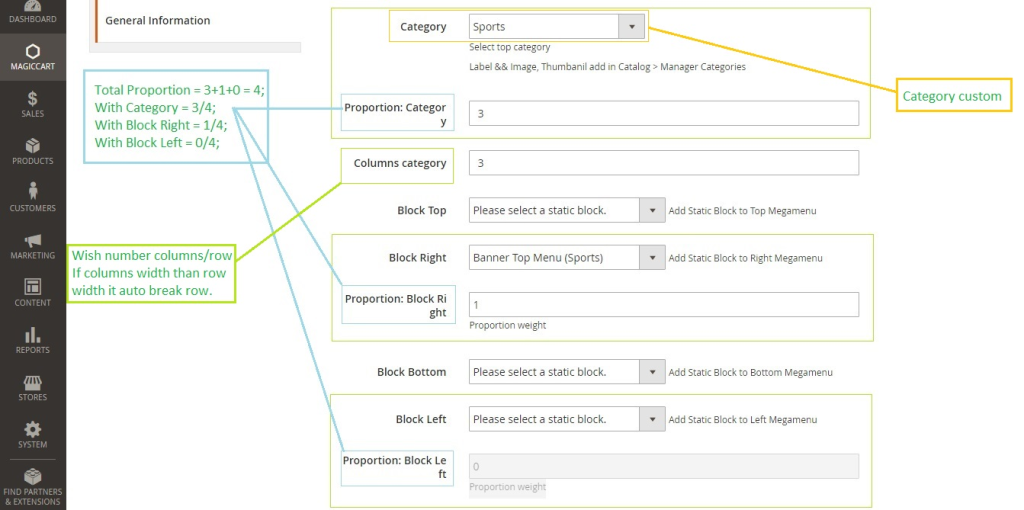
Frontend:

Example 2: Add block to bottom menu
Go to Magiccart > Magic Menu > Menu > Add New Menu => Choose Menu want to custom and config as example blow:
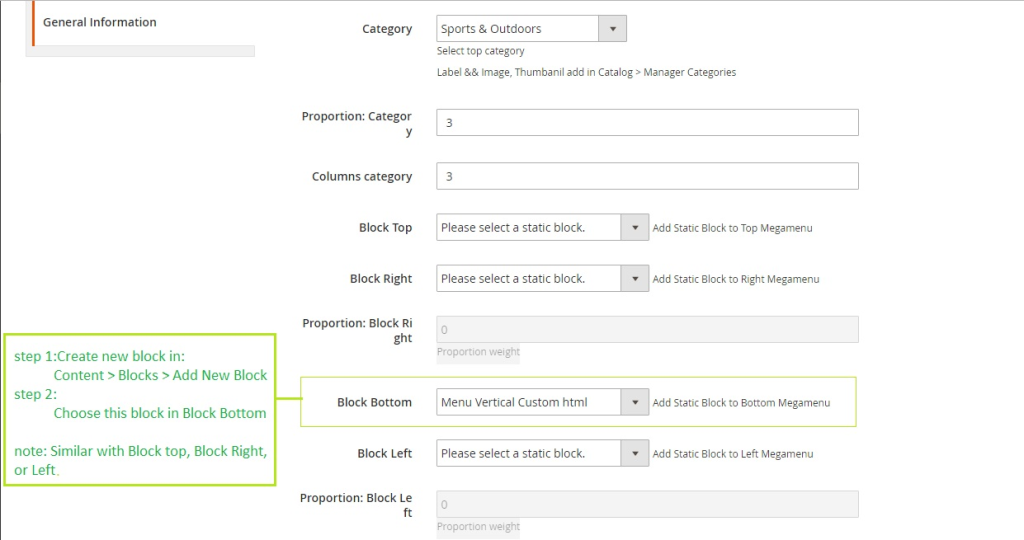
Frontend:

FAQs
- I have added custom block to menu in Magiccart > Magic Menu > Menu, but it doesn’t show
- , You need to go to Admin > STORES > Configuration > Magic Menu > General > Dropdown Navigation => find and un-select it here.
- How to disable demo 1, demo 2, … in home menu?
- Admin > STORES > Configuration > Magic Menu > Top Menu > Show home demo > No
III – Custom Support
– Contact Sales: support@magepow.net


Leave a Reply